

Post by PomeRuck on Jul 12, 2005 1:49:42 GMT -5
Ok you all, now we've seen people cut plastic, but here's a couple more ideas. one of the easiest ways to make your ruckus look NOT STOCK is to cut plastic. both the rear fender, front fender, floor board, and cargo pan area can all be cut with simple tools like sheet metal shears or a dremel cut off wheel.
probably the most common plastic cut is cutting off the retarded looking rear mud guard. now it is very practical if you are running through muddy puddles a lot, but it still looks gay. to cut a straight line, use masking tape as a guide for the cut you want to make. masking tape stretches a bit so you can even curve it a bit. after you are shure where you want to cut use the above listed tools, or even some good scissors will work. all this plastic is soft so don't cut too much. when you are done making your main cut you need to clean it up. use ordinary sand paper starting with a rough grit working your way down to a fine grit. if done correctly, it will look like it came from the factory this way. here's spoonkillers bobbed rear fender. he did a great job.
*edit* go to members rides, el guapo to see his rear fender
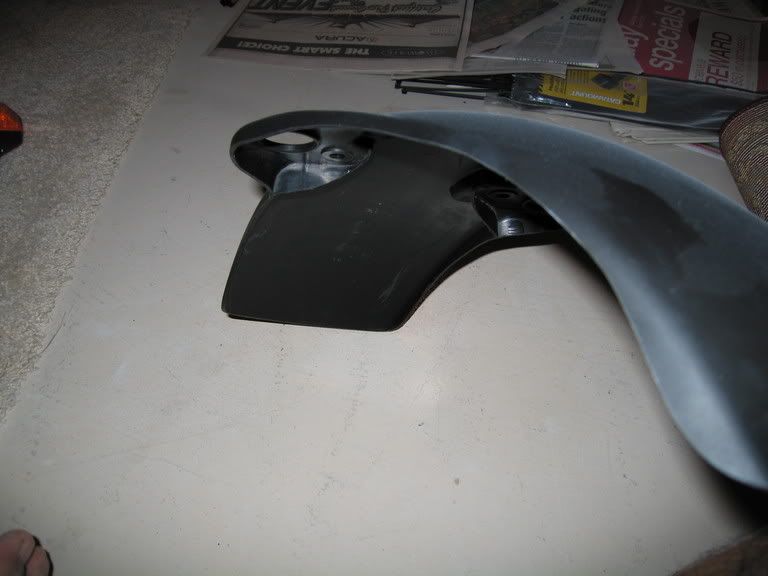
another area you can cut is really a reshaping of the front fender. now it's wide open how you can do this. this is where your artistic side must come out. it's not as hard as it seems, just 4 bolts for the top of the shocks, and 2 to remove the fender. you DON'T have to unbolt the front wheel from the shocks. you might need a hand for this. what i would do is start with one side, obviously removed from the front forks. hold it in your hands and just look at it and imagine what you want it to look like. with a cutting tool of your choice (i used the dremel route), start cutting a little bit off at a time. once one side is done to your satisfaction, work on the other side. now you might go back and forth before its perfect. NOW don't worry about both sides matching up perfectly! remember, no one will notice it's not perfect, if it looks symetrical to your eye. plus, it's impossible to look at both sides at the same time. if it looks good to your eye, then it's good. then, like the rear, use sand paper to smooth out the rough edges. this is what mine looks like.
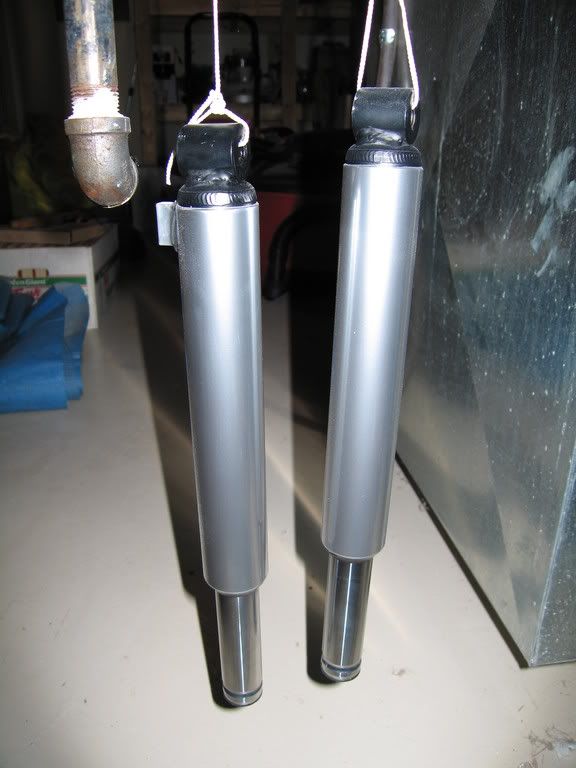
now i also painted my front shocks chrome from a can. this is awesome and easy to do once you are already reshaping your front fender. just tape off, prime them, and paint a few coats. now one tip....this chrome paint takes a SHIT load of time to dry completely. even after 3 days, you can still leave an imprint with little pressure. i would wait like 5 days before doing any real grabbing of the paint. if you install soon, make sure you install the shocks with another person so the tire does NOT rub on the paint. here are my shocks drying.
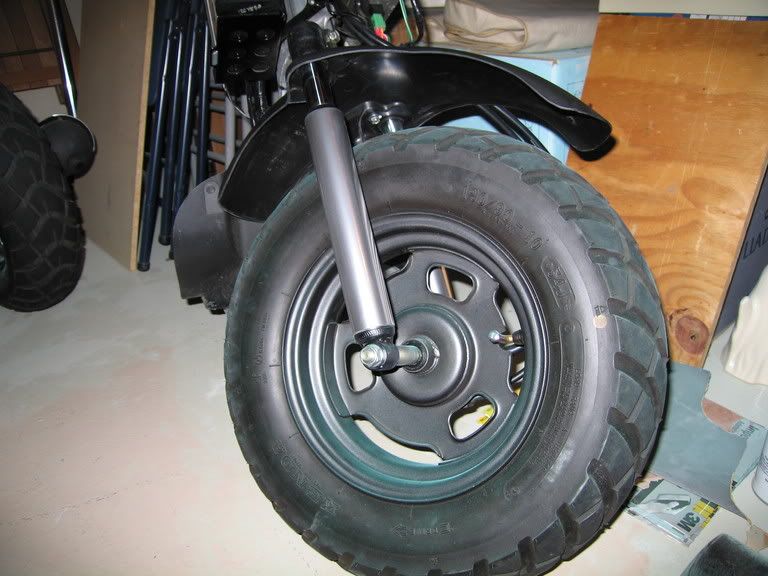
now wammo...here is the FINAL PRODUCT. it will look great when it's all done. you can actually see the top of the shock which is covered by the stock front fender. by the way the rest of my ruckus isn't done...lol i will post the final version when it's reassembled.
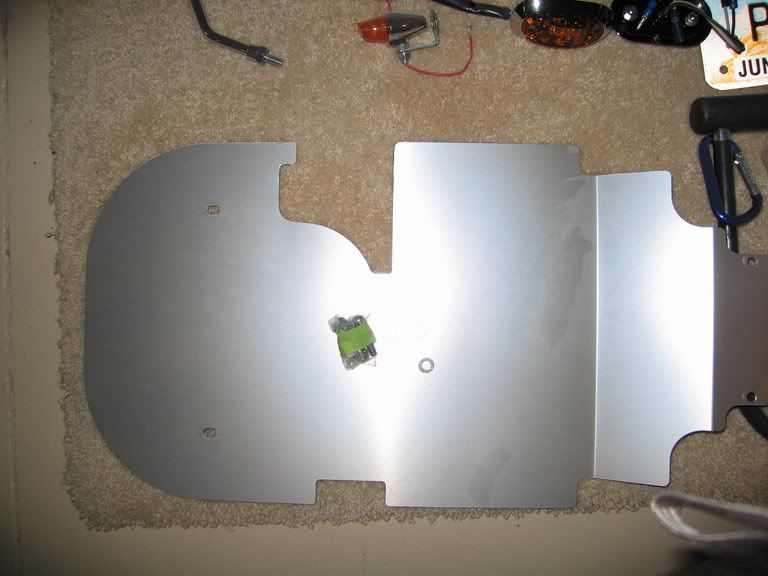
now another area to cut plastic is the floor board. i cut mine here because i'm using the aluminum race cargo pan from battlescooter. i'm not sold on the frame brace yet so here is the solution for the stock floor pan. cut here for the best looks, and support. again, i will post final pics when it is reassembled.
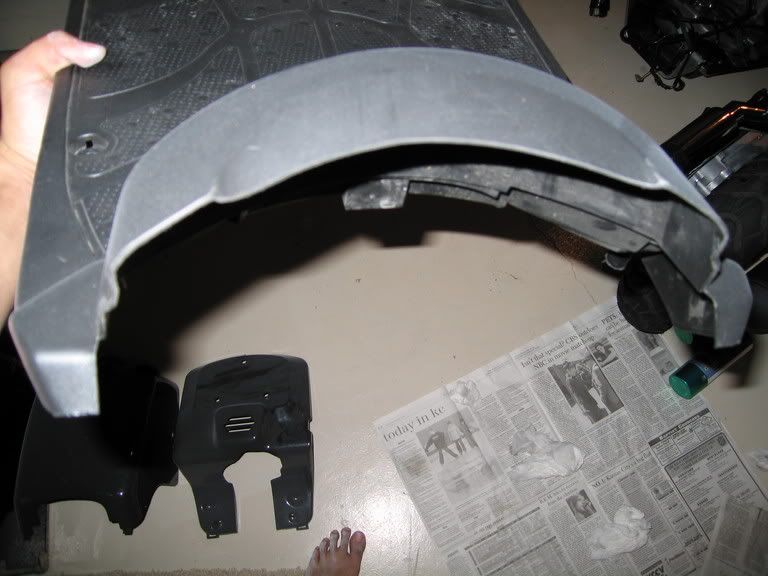
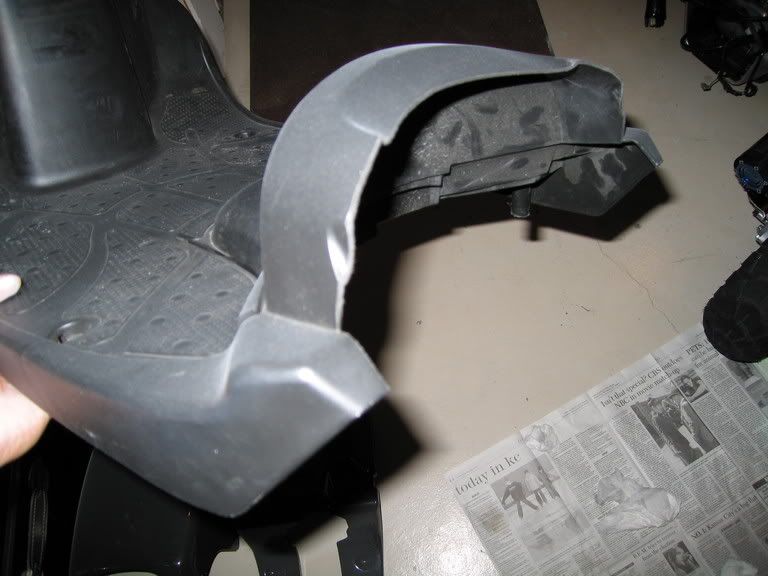
on a side note, because i have the wheelbase extention kit, the rear shock mount is repositioned using an included bracket. the new cargo pan does not fit this application so you have to reshape the outline around the shock mount. this is what i think is the best shape for the new shock mount app.
hope this shit helps somebody...
probably the most common plastic cut is cutting off the retarded looking rear mud guard. now it is very practical if you are running through muddy puddles a lot, but it still looks gay. to cut a straight line, use masking tape as a guide for the cut you want to make. masking tape stretches a bit so you can even curve it a bit. after you are shure where you want to cut use the above listed tools, or even some good scissors will work. all this plastic is soft so don't cut too much. when you are done making your main cut you need to clean it up. use ordinary sand paper starting with a rough grit working your way down to a fine grit. if done correctly, it will look like it came from the factory this way. here's spoonkillers bobbed rear fender. he did a great job.
*edit* go to members rides, el guapo to see his rear fender
another area you can cut is really a reshaping of the front fender. now it's wide open how you can do this. this is where your artistic side must come out. it's not as hard as it seems, just 4 bolts for the top of the shocks, and 2 to remove the fender. you DON'T have to unbolt the front wheel from the shocks. you might need a hand for this. what i would do is start with one side, obviously removed from the front forks. hold it in your hands and just look at it and imagine what you want it to look like. with a cutting tool of your choice (i used the dremel route), start cutting a little bit off at a time. once one side is done to your satisfaction, work on the other side. now you might go back and forth before its perfect. NOW don't worry about both sides matching up perfectly! remember, no one will notice it's not perfect, if it looks symetrical to your eye. plus, it's impossible to look at both sides at the same time. if it looks good to your eye, then it's good. then, like the rear, use sand paper to smooth out the rough edges. this is what mine looks like.
now i also painted my front shocks chrome from a can. this is awesome and easy to do once you are already reshaping your front fender. just tape off, prime them, and paint a few coats. now one tip....this chrome paint takes a SHIT load of time to dry completely. even after 3 days, you can still leave an imprint with little pressure. i would wait like 5 days before doing any real grabbing of the paint. if you install soon, make sure you install the shocks with another person so the tire does NOT rub on the paint. here are my shocks drying.
now wammo...here is the FINAL PRODUCT. it will look great when it's all done. you can actually see the top of the shock which is covered by the stock front fender. by the way the rest of my ruckus isn't done...lol i will post the final version when it's reassembled.
now another area to cut plastic is the floor board. i cut mine here because i'm using the aluminum race cargo pan from battlescooter. i'm not sold on the frame brace yet so here is the solution for the stock floor pan. cut here for the best looks, and support. again, i will post final pics when it is reassembled.
on a side note, because i have the wheelbase extention kit, the rear shock mount is repositioned using an included bracket. the new cargo pan does not fit this application so you have to reshape the outline around the shock mount. this is what i think is the best shape for the new shock mount app.
hope this shit helps somebody...


